Deciduous: A Security Decision Tree Generator
![]()
Security decision trees are a powerful tool to inform saner security prioritization when designing, building, and operating software systems. But creating them has largely involved highly manual tinkering, which is why it’s understandable that I’m constantly asked, “Is there an app that my team can use to create them?” I’m delighted that I now can say “fuck yes there is!” with the release of Deciduous, a security decision tree generator (hosted at https://www.deciduous.app/).
Inspired by the Security Chaos Engineering e-book and my previous blog post on creating security decision trees with Graphviz, one of my unindicted co-conspirators Ryan Petrich built a web app that handles all the annoying grunt work of building an attack tree. This lets you focus on the thinky thinky and typey typey around likely attacker actions, potential mitigations, and how attackers will respond to those mitigations as Deciduous dynamically generates an organized and styled1 graph for you.
Using Deciduous
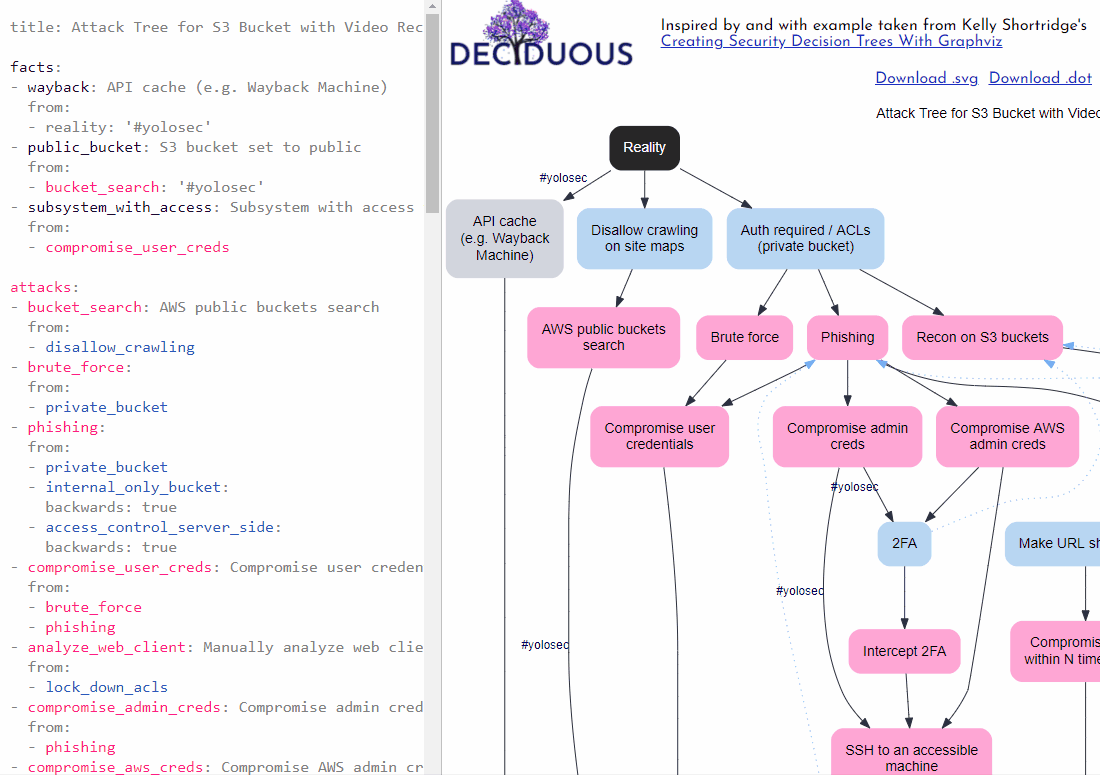
Step one of creating a decision tree is determining what resource you are threat modeling. The default example when you load Deciduous is the example I explored in the Security Chaos Engineering e-book and in the Graphviz blog post: an S3 bucket containing customer video recordings.
Given the e-book is free and explains all you need to know about populating the different parts of the decision-tree with your assumptions, I’ll focus on how to use Deciduous to implement your assumptions rather than walking you through the threat modelling process.
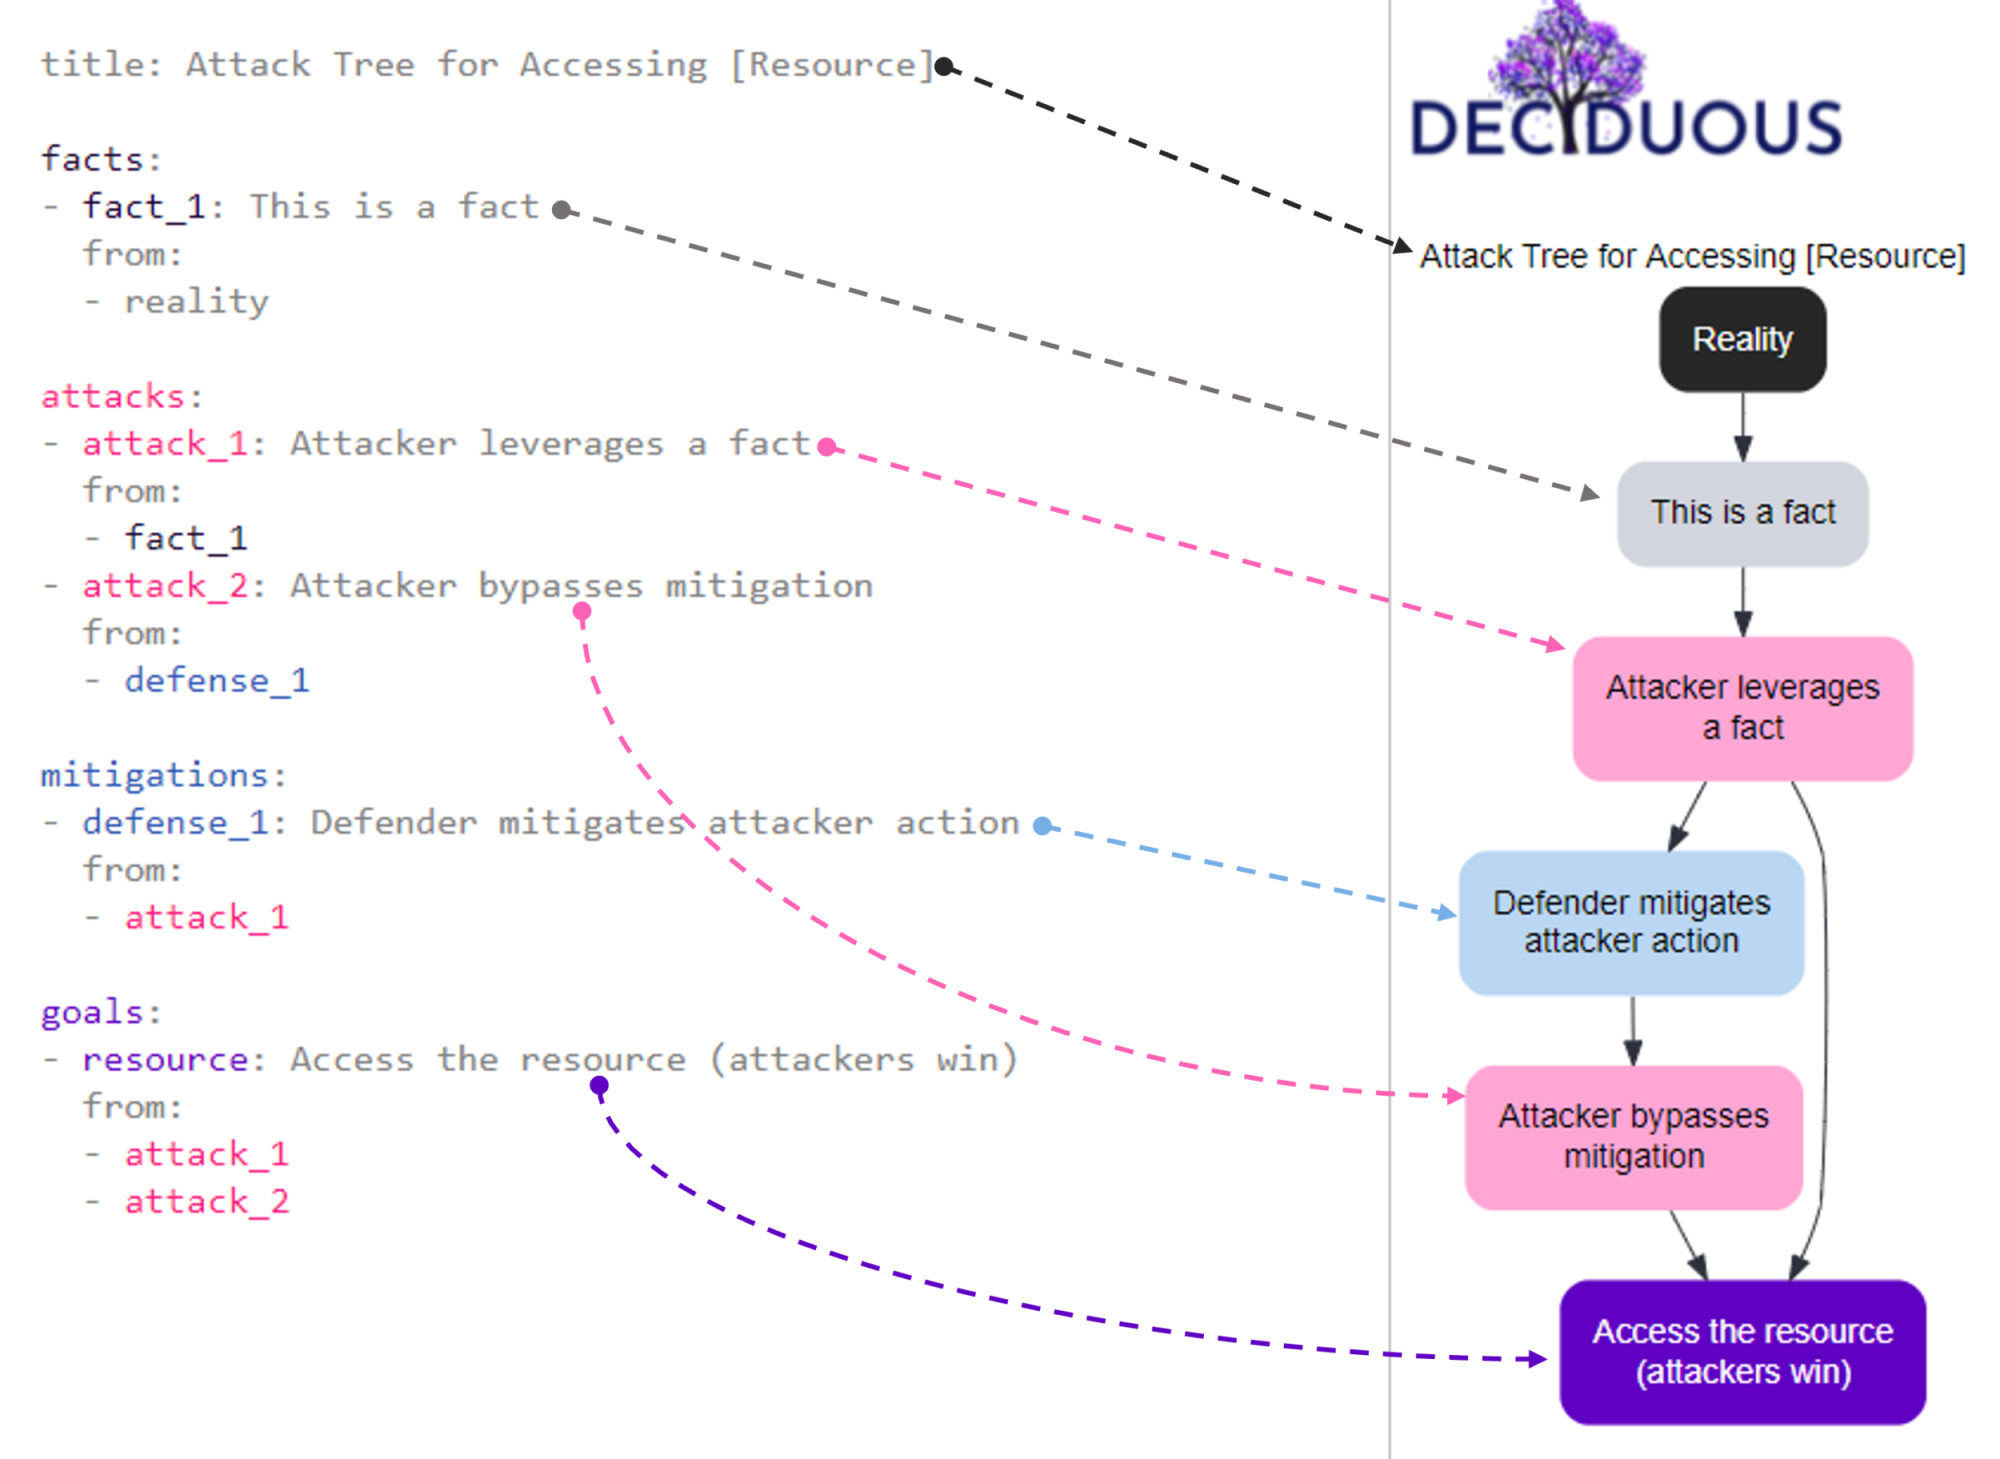
Basic components
Deciduous has two panes: an editor on the left and the generated decision tree on the right. The left sidebar of Deciduous is where you can change the components of the decision tree, which is dynamically generated on the right side. The main categories of components you can change are:
-
title: the name of your decision tree (e.g. “Attack Tree for S3 Bucket with Video Recordings” or “Attack Tree for a Cryptominer in a Cloud-hosted Container”)
-
facts: these are things that are true about the system but aren’t attacker actions or defensive mitigations (e.g. “S3 bucket set to public”); they are shown in dark grey font within the editor and as grey nodes in the graph
-
attacks: these are actions taken by attackers, often appearing as a series of consecutive actions (e.g. “compromise user credentials”) and each node corresponds to a specific attacker action; they are shown in pink font within the editor and as pink nodes in the graph
-
mitigations: these actions taken by defenders to mitigate attacker activity (e.g. “authentication required” or “2FA”) and each node corresponds to a specific mitigation; they are shown in blue font in the editor and as blue nodes in the graph
-
goals: this is the attacker’s ultimate goal, the end result that results in them winning (e.g. “Access video recordings in S3 bucket” or “Run a cryptominer in a cloud-hosted container”); it is shown in purple font color in the editor and as a purple node at the bottom of the graph
For the visual learners among you, here is a super basic security decision tree showing how the text on the left corresponds to the components in the graph on the right:
Navigating the tree
Clicking on a node in the decision tree will jump you to its location in the editor on the left (as shown in the gif below). This saves you from scrolling and hunting for the text that corresponds to a component in the tree. Deciduous also supports syntax highlighting to help you differentiate between components.
Connecting nodes together
A decision tree graphs sequences of actions by connecting nodes in a particular order. For instance, my morning routine would include the sequential decisions get out of bed --> make matcha because my decision to make matcha only happens after I decide to get out of bed.
We can describe this as one decision flowing from another decision. In fact, a single decision can flow from multiple prior decisions; the make matcha decision could directly flow from get out of bed or conduct blood sacrifice to the eldritch ones. And a decision can flow from someone else’s decision, like my cat’s decision to lick hooman's nose leading to my decision to get out of bed.
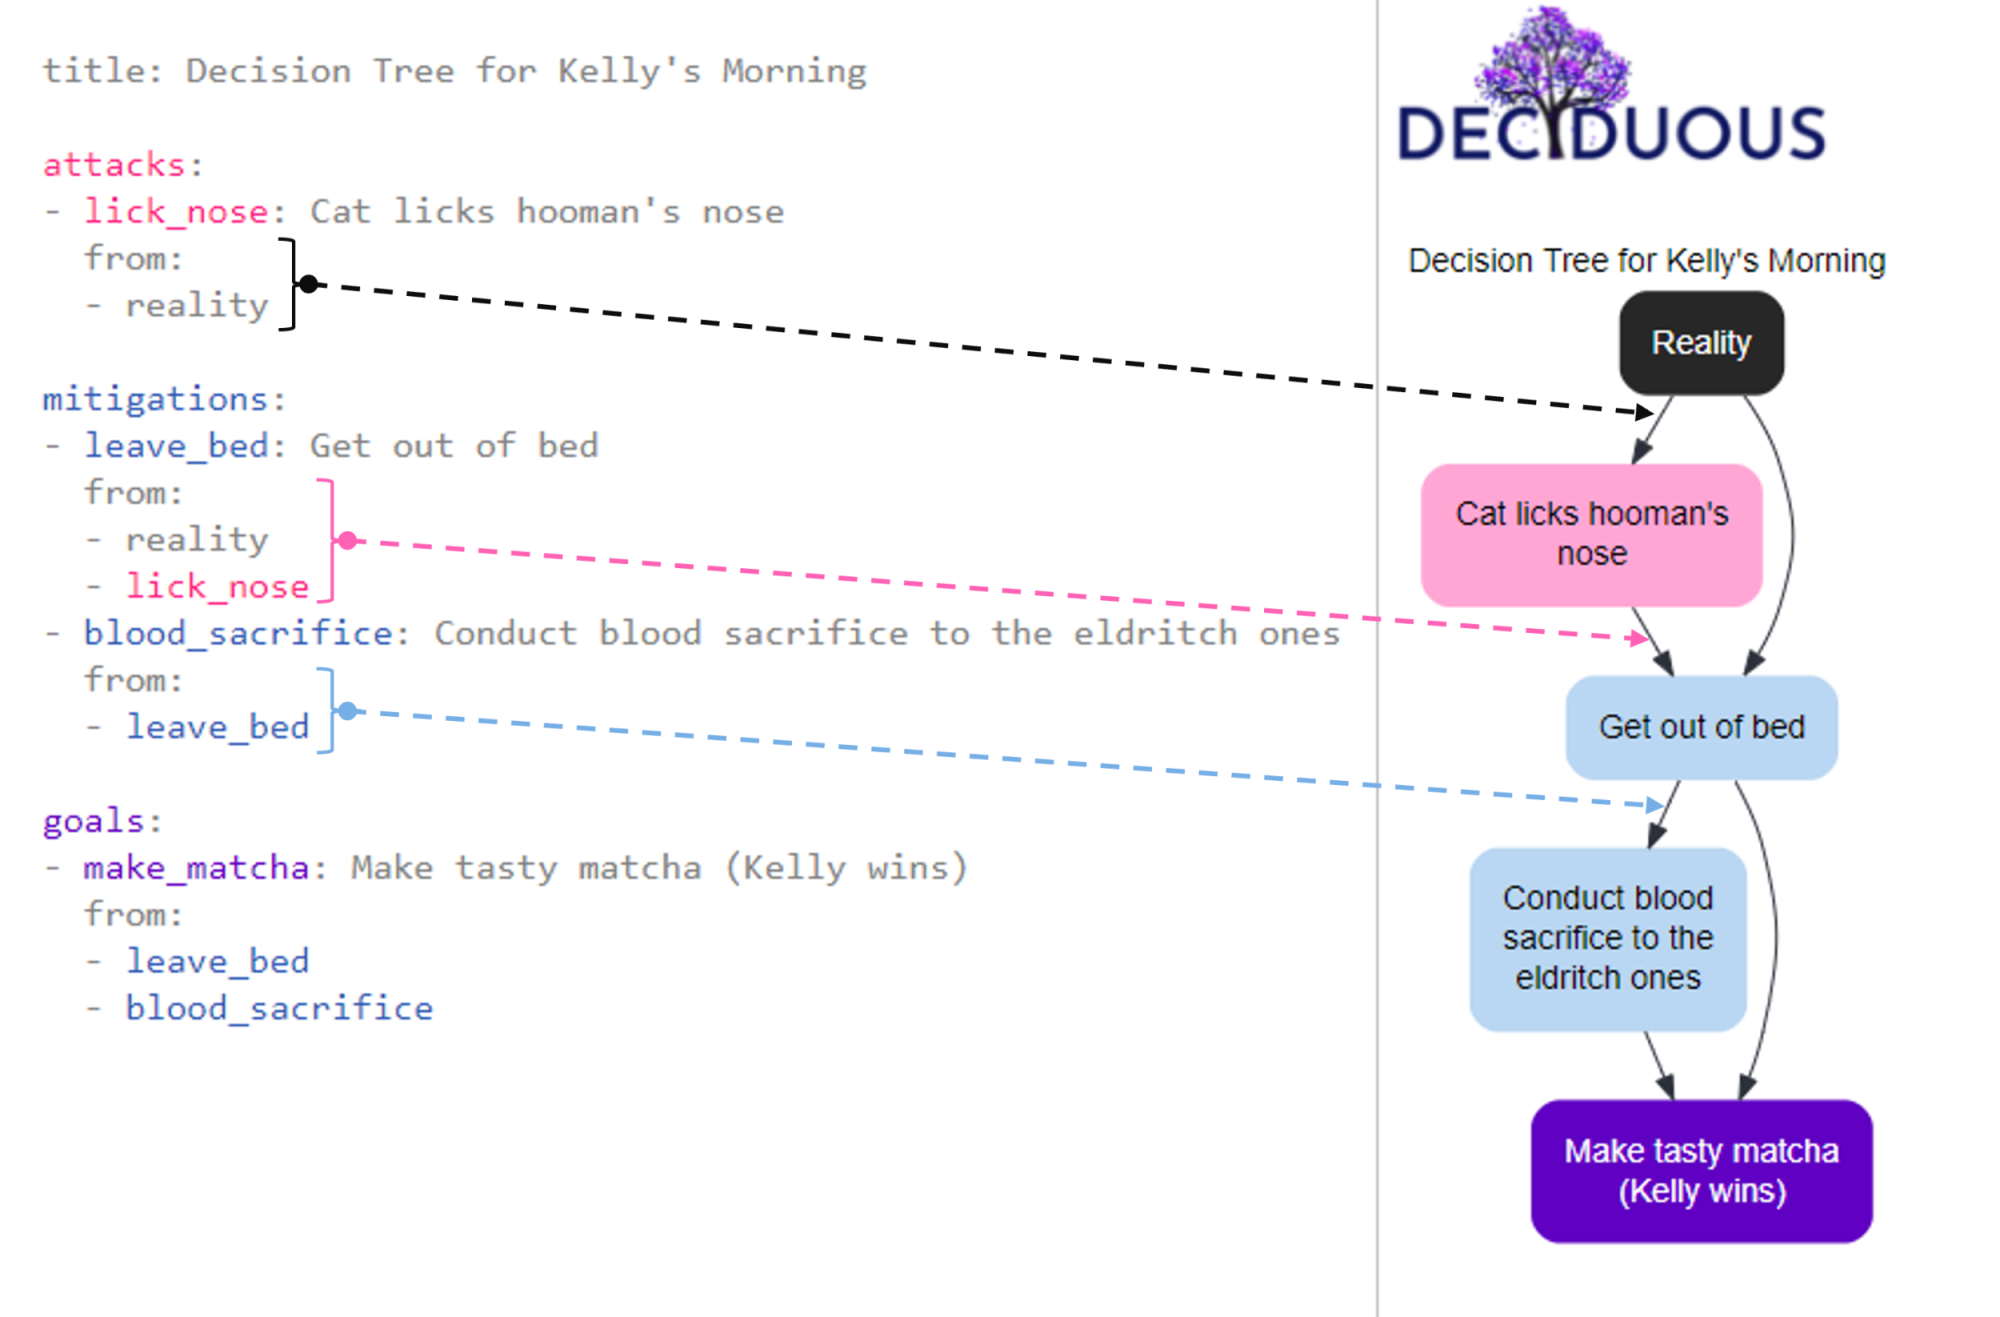
Creating “from” flow
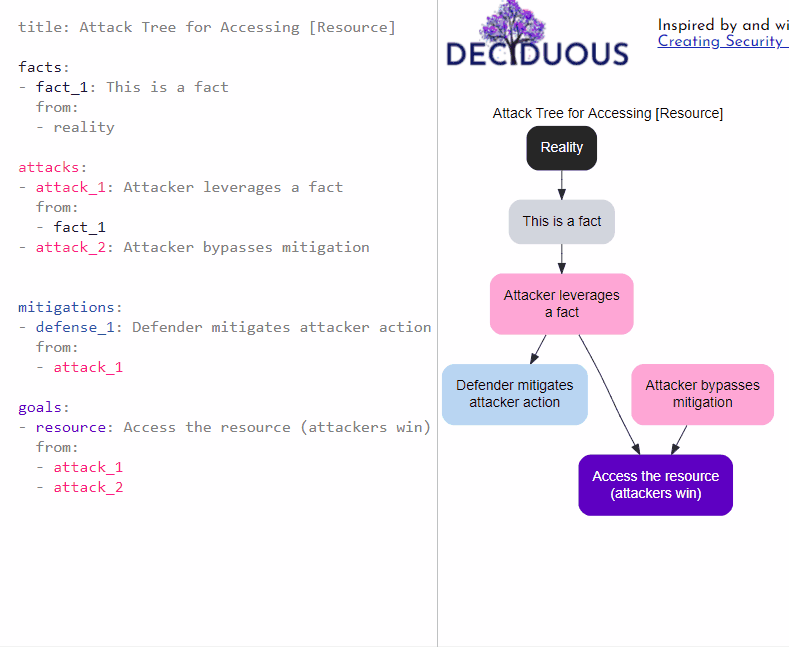
To capture this flow in the graph, you can define the list of decisions (i.e. other nodes) that directly lead to a particular node by using from:. For example, we could implement a mitigation (defense_1) in response to an attacker action (attack_1). This means we want to show that defense_1 flows from attack_1. To do so, we can type:
mitigations:
- defense_1: Defender mitigates attacker action
  from:
  - attack_1
This declaration manifests on the decision tree by adding an arrow pointing from the node labeled Attacker leverages a fact to the node labeled Defender mitigates attacker action, as shown here:

We can also express that the attacker responds to this mitigation by bypassing it with a second action (attack_2):
- attack_2: Attacker bypasses mitigation
  from:
  - defense_1
Backwards connections
Sometimes a mitigation amputates the attacker’s path forward; ergo, the attacker cannot pursue the current branch any further and must escalate their effort by restarting on another branch.
For instance, the presence of 2FA can abscise the branch containing the node representing the attacker using legitimate credentials to access a resource. Instead, the attacker is forced to pursue an exploitation-based strategy, a branch that begins with the decision to gather intelligence on exploitable resources (aka “recon”).
To convey this dynamic, you can specify backwards: true when connecting nodes with from. For example, the following snippet visualizes that implementing 2FA as a mitigation would compel attackers back up the tree to pursue a new branch starting with the action Recon on S3 buckets:
- recon_on_s3: Recon on S3 buckets
  from:
  - 2fa:
    backwards: true
Your goal node will likely have a lot of other nodes connecting to it (especially attack nodes). By the end of your configuration, all roads should lead to the Rome that is your goal node.
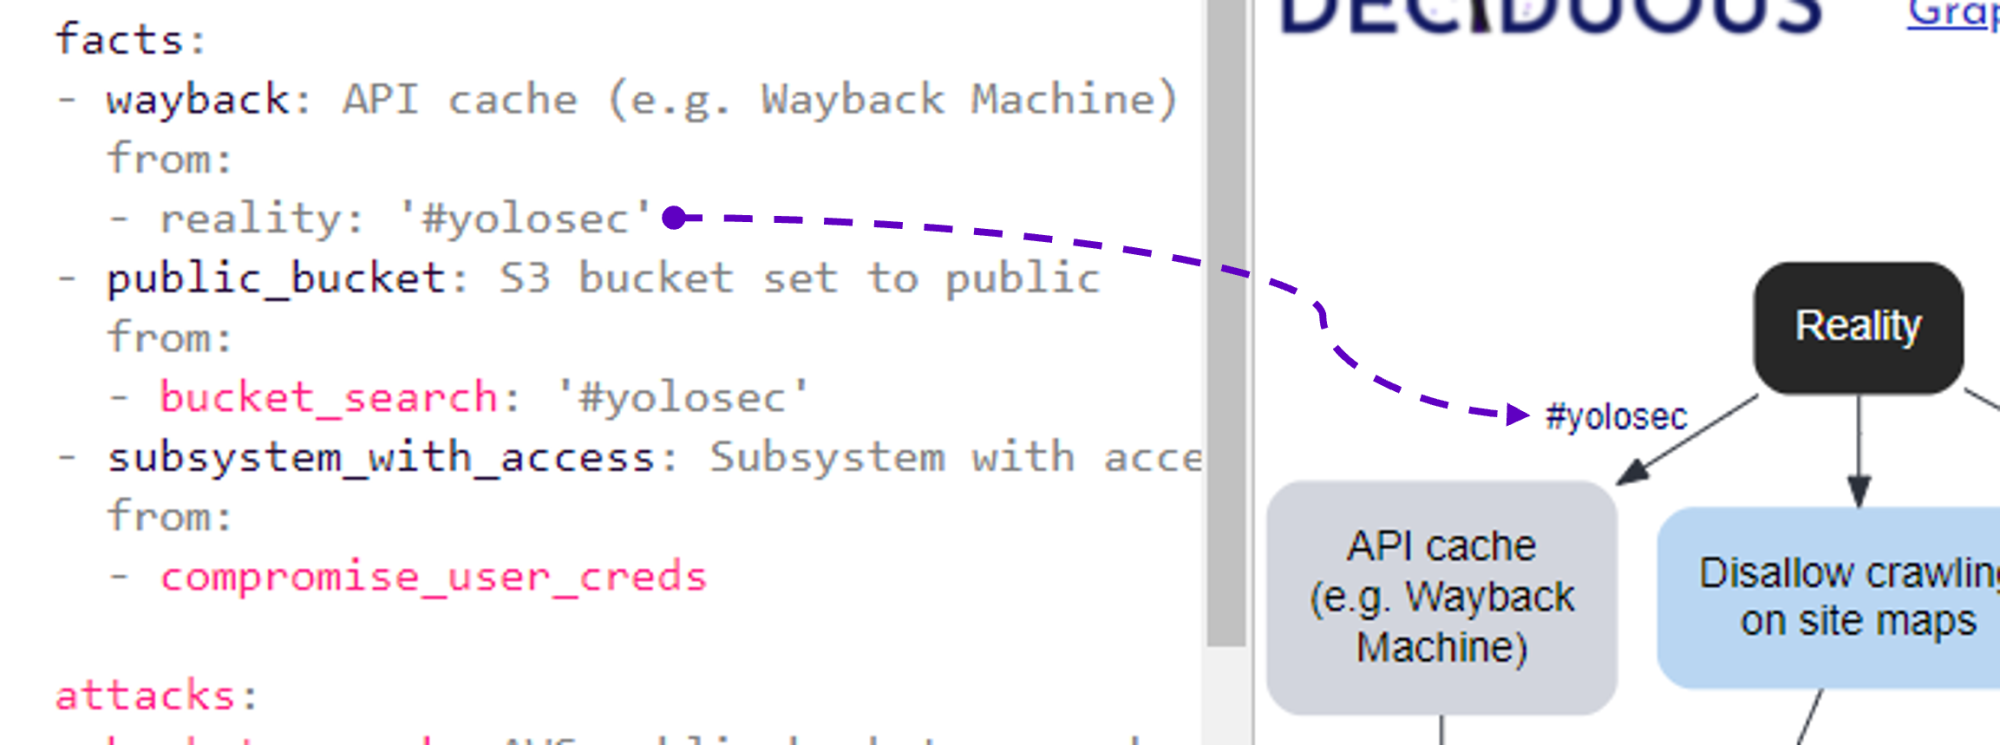
Adding #yolosec labels
The reality for many organizations is that there is often an absence of a mitigation or else an implementation of “worst practice” – a phenomenon I’ve previously dubbed “YOLOsec”.
For example, failing to disallow Wayback Machine’s caching of an API handling sensitive customer data is an inaction that begets a facile way for attackers to win. Such a big yikes reflects a YOLO attitude to security and therefore should be labeled as such in our decision tree by adding #yolosec next to the relevant connection, as seen here:
facts:
- wayback: API cache (e.g. Wayback Machine)
  from:
  - reality: '#yolosec'
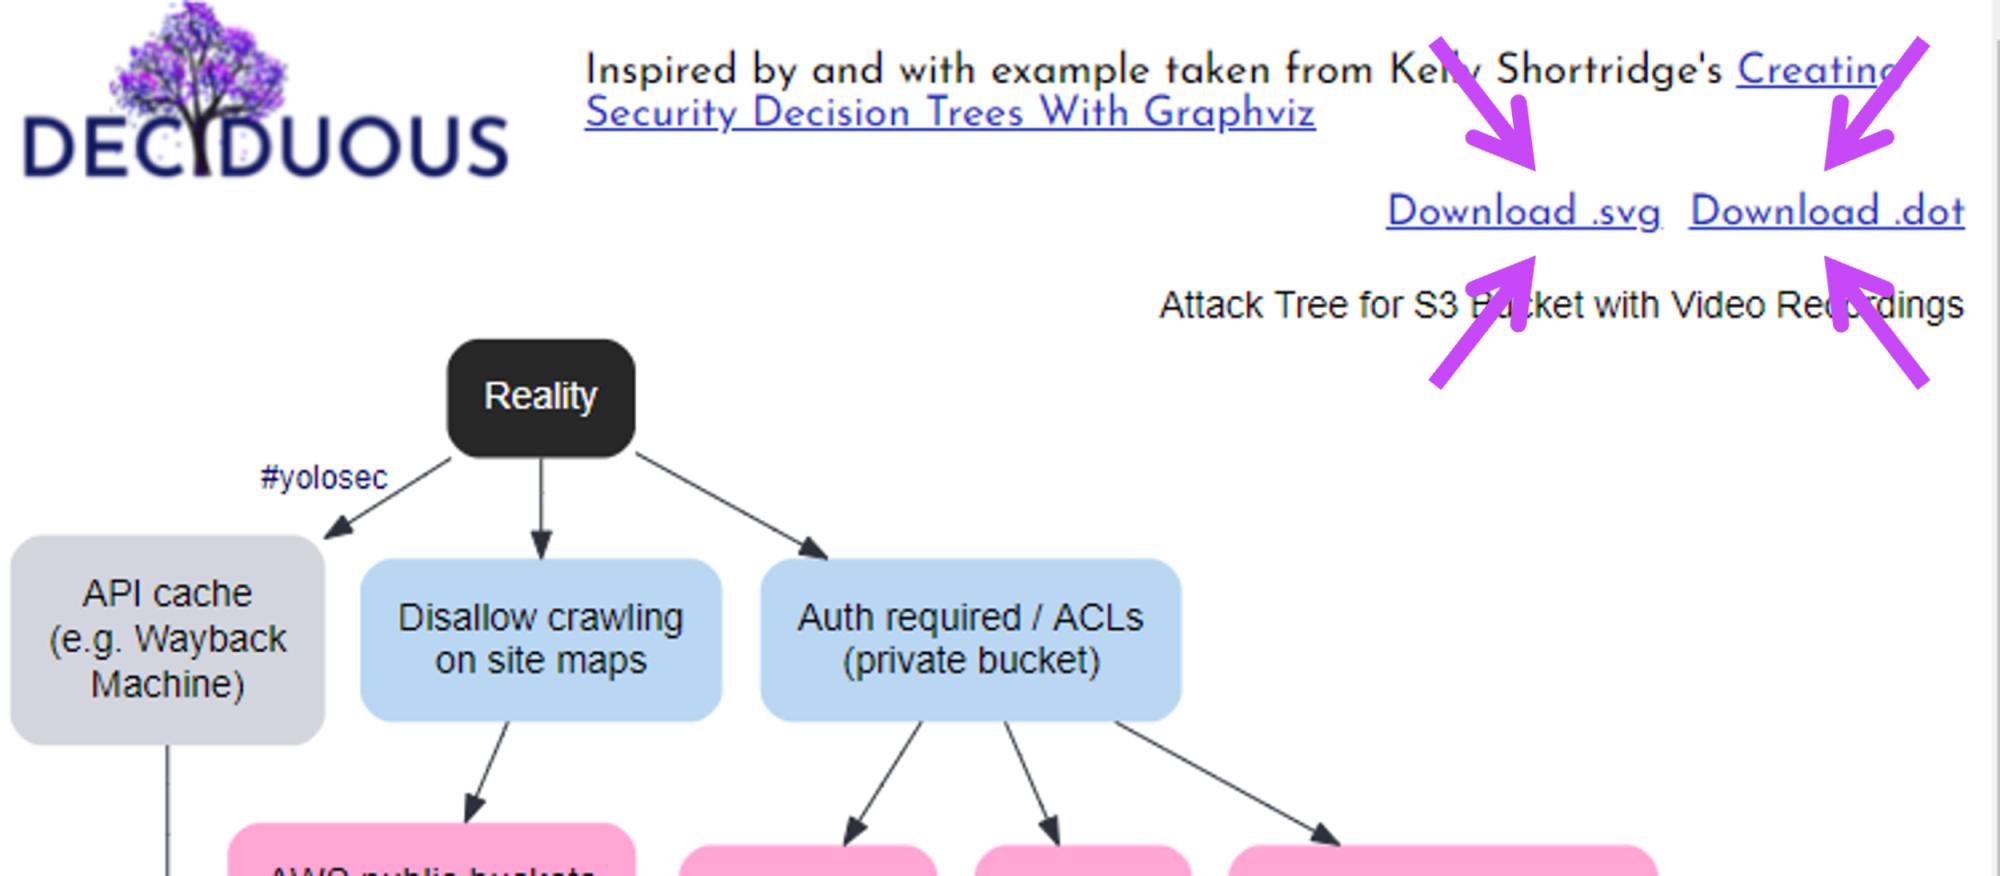
Downloading the tree
Accessible documentation is a crucial part of fostering an organizational learning culture, so you can download and share your tree with your team2 as an SVG file or print it as a PDF.
You can also download the .DOT file (which Graphviz uses) to store as a reference or tweak as you desire on your own machine. Sharing is caring!
Conclusion
Using Deciduous to edit text and immediately behold the resulting changes is a lot easier than fiddling around with Graphviz or using cumbersome drag-and-drop tools3. We hope this makes your security decision tree journey more straightforward, especially for software engineering teams seeking to better design for resiliency.
Constructive feedback is welcome so we can help level up the art of threat modeling and better serve the community. Feel free to tweet constructive feedback to @rpetrich or @swagitda_ and check out the open source repo.
-
As readers of the Graphviz blog post know, the quest for decent layout and styling was an arduous one and I am sincerely glad that others can avoid such hardship by using Deciduous. Seriously, getting the layout to not suck is surprisingly challenging for autolayout and manual config alike, and you do not want to drown in that time sink. ↩︎
-
I assume most people share security decision trees with their colleagues or clients, but any of y’all who share trees with friends for funsies are kindred spirits of mine <3 ↩︎
-
Looks askance at Visio :eyes: ↩︎